Removal
1. Remove and disconnect tail lamp assembly from chrome base.
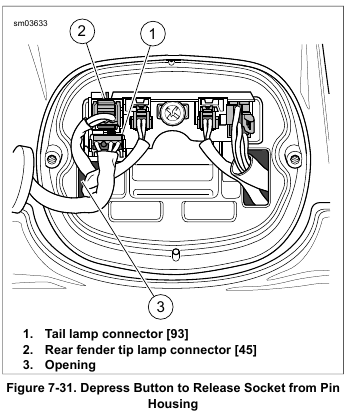
2. See Figure 7-31. Disconnect rear fender tip lamp connector [45] (2).
3. Remove harness from upper clip on inner side of fender.
4. Remove locknut, washer and P-clamp securing harness near lamp.
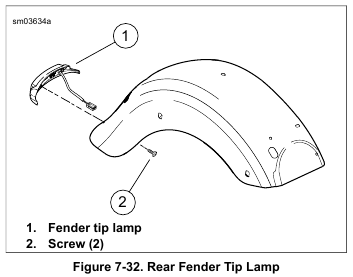
5. See Figure 7-32. Remove two screws (2).
6. Remove fender tip lamp.
Installation
1. See Figure 7-31. Route rear fender tip lamp harness through hole at bottom of fender and back through opening (3). Attach rear fender tip lamp connector [45] (2).
2. Secure lamp harness to upper clip on inner side of fender.
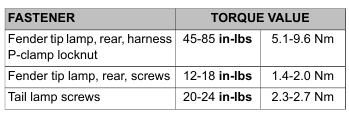
3. Secure lower portion of harness with P-clamp, washer and locknut. Tighten to 45-85 in-lbs (5.1-9.6 Nm).
4. See Figure 7-32. Place fender tip lamp into position. Secure with two screws (2). Tighten to 12-18 in-lbs (1.4-2.0 Nm).
5. See Figure 7-31. Attach tail lamp connector [93] (1).
6. Install tail lamp with two screws. Tighten to 20-24 in-lbs (2.3-2.7 Nm).
Be sure that all lights and switches operate properly before operating motorcycle. Low visibility of rider can result in death or serious injury. (00316a)
7. Test lamp operation.
Leave a Reply