1. Remove exhaust system. See 4.18 EXHAUST SYSTEM.
2. Remove fuel tank. See 4.6 FUEL TANK.
3. Remove air cleaner and backplate. See 4.5 AIR CLEANER ASSEMBLY.
4. Remove spark plugs. See 1.19 SPARK PLUGS.
5. Remove induction module. See 4.13 INDUCTION MODULE.
6. Gather disconnected branches of main harness and tape to top of wire trough.
7. Twin-Cooled models: See C.5 COOLING SYSTEM REPAIR, Upper Coolant Line Removal.
a. Disconnect coolant manifolds from cylinder head lines.
b. Remove clamp securing hoses to front cylinder head. Move hoses out of the way.
8. Remove voltage regulator. See 7.20 VOLTAGE REGULATOR.
9. Remove CKP sensor. See 7.17 CRANKSHAFT POSITION SENSOR (CKP).
10. Remove oil filter. See 1.6 ENGINE OIL AND FILTER.
11. Remove oil pressure switch/sender. See 7.25 OIL PRESSURE SWITCH OR SENDER.
12. Coil main harness and allow to hang below lower frame tube at front of motorcycle.
13. Remove primary chaincase. See 5.5 PRIMARY CHAINCASE HOUSING.
14. Remove rotor and stator. See 7.21 ALTERNATOR.
15. Wrap rear master cylinder reservoir with foam padding or bubble pack.
16. Cover lower frame tubes (both left and right side) with foam padding or bubble pack to prevent damage to frame tubes, brake line and main harness. A split loom conduit or a half shell of PVC tubing will also produce good results.
17. Cover rocker covers with foam padding or bubble pack.
18. Place a jack under the oil pan and use a block of wood between the jack and oil pan to distribute pressure across the length of the casting. Raise the jack until firm contact is made with the bottom of the oil pan.
19. Remove top engine stabilizer bracket from front cylinder head. Remove stabilizer link from frame weldment.
20. Remove four bolts (with flat washers) in a crosswise pattern to free transmission from crankcase.
21. Remove front engine mount. See 2.54 FRONT ENGINE MOUNT.
22. Move engine forward far enough to clear two ring dowels at bottom of transmission flange. Raise engine and remove from right side of motorcycle. Exercise caution to avoid contact with rear brake line, rear brake master cylinder reservoir, and main harness.
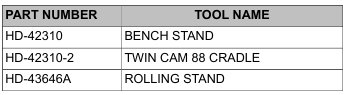
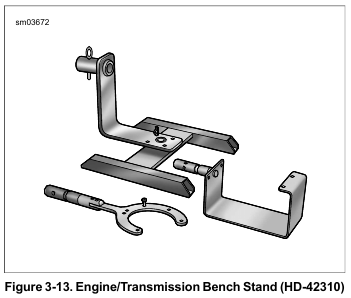
23. See Figure 3-13. Using the TWIN CAM 88 CRADLE (Part No. HD-42310-2), install engine in BENCH STAND (Part No. HD-42310) or ROLLING STAND (Part No. HD-43646A).
24. Thoroughly wipe all engine oil from pockets in crankcase flange. Remove gasket and two index pins from transmission flange. Discard gasket.
25. Remove and clean the oil pan under any of the following conditions. See 3.31 OIL PAN.
a. Metal debris is found in the engine or crankcase.
b. Oil contamination is suspected.
c. A complete engine overhaul is being performed as a result of a major engine failure.
d. The engine is being replaced with a new one.
Leave a Reply