
Removal
1. Remove the nacelle half containing the switch to be replaced. See 2.47 HEADLAMP NACELLE: ROAD KING MODELS.
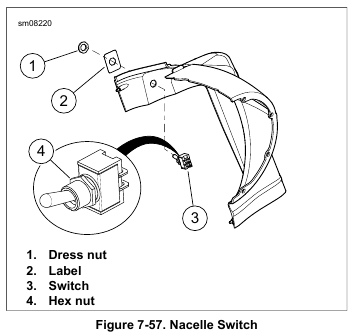
2. See Figure 7-57. Remove dress nut (1).
3. Remove switch (3).
Installation
1. See Figure 7-57. Install the switch:
a. Turn hex nut (4) down against switch body.
b. Verify label (2) is in place.
c. Put the switch (3) in place.
d. Install the dress nut (1) 1.5-2.5 turns.
2. Turn hex nut (4) against the inside of the nacelle. Tighten to 9-15 in-lbs (1.0-1.7 Nm).
3. Install the nacelle half. See 2.47 HEADLAMP NACELLE: ROAD KING MODELS.
4. Operate switch to verify repair.
Leave a Reply