Removal
1. Remove two screws to release tail lamp assembly from chrome base.
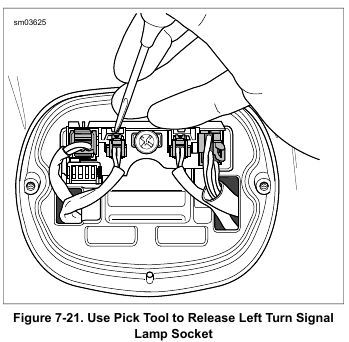
2. See Figure 7-20 and Figure 7-21. Disconnect all connectors.
NOTE
See Figure 7-21. To release turn signal lamp connectors, use a pick or small screwdriver to press latch.
3. Remove screw at center of chrome base. Push chrome base upward until it is free of fender. Pull out of fender hole.
4. Remove chrome base.
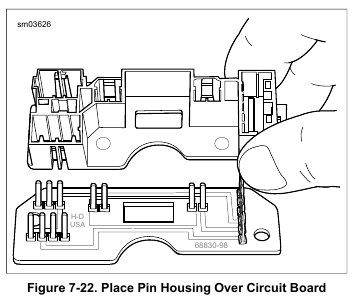
5. Remove pin housing/circuit board from chrome base.

Installation
1. See Figure 7-20. Feed connectors through openings in chrome base. For best results, feed the larger socket housings first.
2. Fit bottom of chrome base into fender hole and push down.
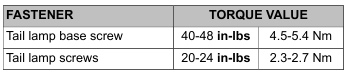
3. See Figure 7-22. Install pin housing/circuit board with screw. Tighten to 40-48 in-lbs (4.5-5.4 Nm).
4. Install connectors into circuit board.
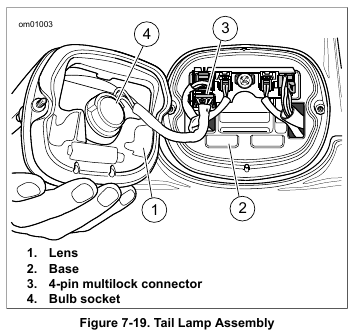
5. See Figure 7-19. To avoid stressing wires, verify that tail lamp harness is positioned on the outboard side of the rear fender tip lamp and left turn signal lamp harness.
6. Install tail lamp with two screws. Tighten to 20-24 in-lbs (2.3-2.7 Nm).
Be sure that all lights and switches operate properly before operating motorcycle. Low visibility of rider can result in death or serious injury. (00316a)
7. Test tail lamp operation.
Leave a Reply