1. Feed connector and conduit through hole in crankcase from inside crankcase.
2. Lubricate parts with glass cleaner or isopropyl alcohol.
Ribs of grommet must be clean and free of dirt and oily residue.
3. Push grommet into crankcase bore while carefully pulling on outside cable. Installation is complete when cable stop contacts casting and capped rib of grommet exits crankcase bore.
NOTE
Do not reuse stator mounting screws. The threads of the screws contain a locking compound in pellet form. When the screw is started, the pellet breaks, releasing the compound.
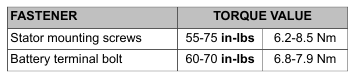
4. Secure stator to crankcase using four new screws. Tighten to 55-75 in-lbs (6.2-8.5 Nm).
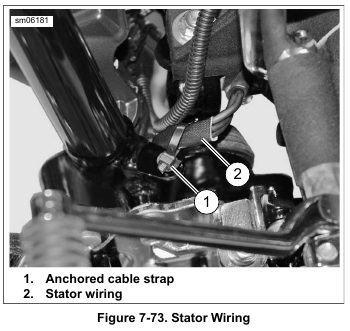
5. See Figure 7-73. Install new anchored cable strap (1) on stator wiring (2). Push anchor into hole in frame.
6. Install connector to voltage regulator and engage locking latch.
The high-output rotor contains powerful magnets. Exercise caution to prevent possible hand injury during removal and installation. (00558b)
7. Install rotor onto the compensating sprocket shaft.
8. Install primary chaincase housing. See 5.5 PRIMARY CHAINCASE HOUSING.
9. Connect negative battery cable. Tighten bolt to 60-70 in-lbs (6.8-7.9 Nm).
10. Install seat. See 2.30 SEAT.
Leave a Reply