NOTE
Avoid kinking the fuel supply line when installing/removing the fuel pressure gauge and adapters.
1. Purge and disconnect fuel supply line. See 4.6 FUEL TANK, Removal. Leave the fuel pump connector separated.
NOTE
Use two fuel pressure gauge adapters to prevent twisting of the fuel supply line. Tug on all connections to verify they are secure.
2. Install fuel pressure gauge adapters as follows:
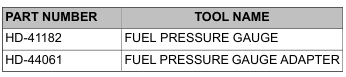
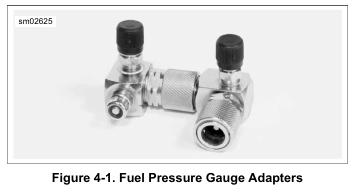
a. See Figure 4-1. Connect two FUEL PRESSURE GAUGE ADAPTER (Part No. HD-44061) together.
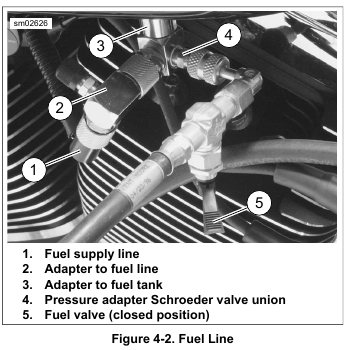
b. Connect fuel line to adapter assembly.
c. Connect adapter assembly to quick-connect fitting on fuel tank.
3. Verify that the fuel valve and air bleed petcock on the FUEL PRESSURE GAUGE (Part No. HD-41182) are closed.
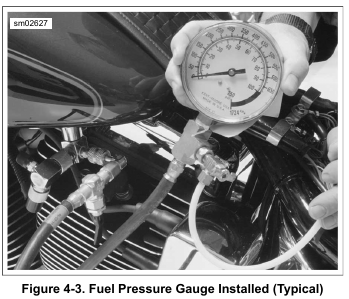
4. See Figure 4-2. Connect fuel pressure gauge to Schroeder valve closest to the fuel tank.
5. Mate fuel pump connector.
6. Start and idle engine to pressurize the fuel system. Open the fuel valve.
7. Position the clear air bleed tube in a suitable container and purge the gauge and hose of air. Close the petcock.
8. Vary the engine speed and note the reading of the pressure gauge. Fuel pressure should remain steady at 55-62 psi (380-425 kPa).
NOTE
If the fuel pressure is not within specification, see the electrical diagnostic manual for further diagnosis.
9. Turn off the engine. Purge the fuel pressure gauge of gasoline and remove fuel pressure gauge from Schroeder valve. Install protective cap.
10. Remove adaptor fitting assembly from fuel supply line and quick-connect fitting on fuel tank.
11. Connect fuel supply line fitting to fuel tank quick-connect. Tug on fuel supply line fitting to verify that it is secure.
Leave a Reply