1. Place clean shop towels over crankcase bore. This prevents the piston pin retaining ring from falling into the
crankcase.
NOTE
It is not necessary to remove both piston pin retaining rings for piston removal.
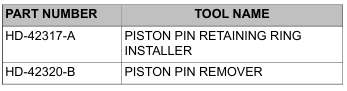
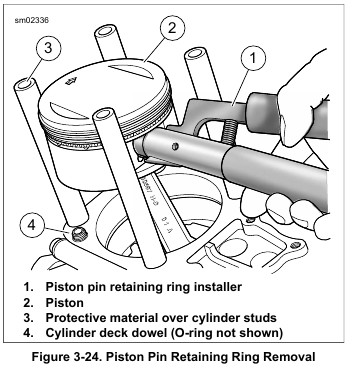
2. See Figure 3-24. Using PISTON PIN RETAINING RING INSTALLER (Part No. HD-42317-A), remove and discard one piston pin retaining ring.
a. Insert tool (1) into piston pin bore. Position claw on tool in slot of piston (2) (directly under retaining ring).
b. Squeeze handles of tool together. Pull retaining ring from bore. Discard retaining ring.
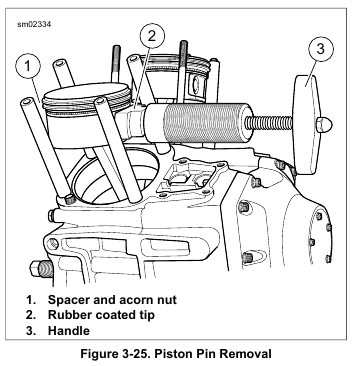
3. See Figure 3-25. Remove the piston pin. If piston pin is difficult to remove, use PISTON PIN REMOVER (Part No. HD-42320-B).
4. Remove the piston. Hold the connecting rod upright to prevent it from striking the crankcase.
5. Place a 3.0 in. (76.2 mm) long piece of foam-type water pipe insulation around connecting rod to prevent damage. Use material with an I.D. of 1.0 in. (25.4 mm).
6. Turn the piston over. Mark the pin boss with the letters F(ront) or R(ear) to identify location.
7. For inspection information, see 3.24 PISTON.
8. Complete engine repair:
a. If performing a top end overhaul only, see 3.25 TOP END OVERHAUL: ASSEMBLY.
b. If performing a complete engine overhaul, see 3.26 CAM COMPARTMENT AND COMPONENTS
and 3.28 CRANKCASE DISASSEMBLY AND REPAIR.
Leave a Reply